Chemical properties of group 2 and group 7 (17) elements

Area of Science:

CHEMISTRY

Grade level:

Advanced Supplementary (AS)

Age of students:

17 Yrs

Total time:

4hrs 20mins

Preparation time:

80 mins

Teaching time:

3hrs

Teahing methodology to be used:

The Teaching will be both practical and flipped classroom based, the students will be given video links with exploratory questions to prepare for this extended practical activity, which comprises of 4 lessons. The lesson will be carried out practically, however the exploratory questions need to be fully answered and understood by the student before they commence the practical investigation.

Key concepts:

Atomic structure and how the chemical properties of elements depend on their atomic structure, and in particular on the arrangement of electrons around the nucleus. 

Students consider the trends and reactions of Group VII elements in detail. These practical activities allow students to develop the important quantitative techniques. They also understand analytical tests, enabling students to gain experience in qualitative practical skills such as observation.

Overview

Carry out the practical’s relating to group chemistry and discuss the similarities and differences in the chemical properties of the groups 2 and 7.

Student mission

You are a Scientist working in a forensic laboratory, samples of unknown inorganic materials were collected from a factory warehouse after it went on fire. The fire is thought to be arson by the police investigators and you have been assigned the task of analysis. You must determine what the unknown materials are, based on their reactivity.

You are responsible for Materials Analysis. 

Your tasks are to Determine the chemical reactivity of the unknown materials.

21st century technical skills gained through this activity

List of skills: 

  • Problem Solving, 
  • Practical analysis, 
  • Critical thinking, 
  • Drawing conclusions based on fact, 
  • Enquiry based learning.

Forensic Scientist

Forensic Investigator

Chemical analyst

Differentiation strategies to meet diverse learning needs

Peer Mentoring, Scaffolded practical tasks, forming and framing questions.

Lesson plan

Four 45 minutes lessons (If your lessons are shorter or longer, you can either break this sequence into more lessons or less).

Time to complete Lesson

Group 2: Metals

  • Know the appearance of elements of Group 2 and know that the metals further down the group need to be stored in oil. 
  • Also know their Physical and chemical properties listed in the table below. 
  • Know that flame tests are used to identify metal cations and also demonstrates the existence of electron shells. 
Physical properties Chemical properties
Know they are good conductors of electricity.

Know They have low densities.

Know that they have grey shiny surfaces when freshly cut with a knife.

Know that they are very reactive metals.

Know that they form ionic compounds with non-metals.


Group 7 (17): Halogens

Know the trends in the reactivity of the halogens can be explained by their readiness to accept electrons from other species.

Expected Learning Outcomes

Atomic Radius trends, Ionization energy trends, groups and periods, nuclear charge.

Prior knowledge and vocabulary

Provide students with the print out of the Scientific Inquiry model and the Test Your Idea template to help them with their investigative question. See Annex I. and II.

Science and Engineering/Math Practices

Group 2 Metals

CCEA GCE Chemistry: 


Unit AS 1: Basic Concepts in Physical and Inorganic Chemistry


1.10 Qualitative Tests:

1.10.3 Use cation tests, including:

  • Flame tests to identify the metal ions Li+, Na+, K+, Ca2+, Ba2+ and Cu2+


Unit AS 2: Further Physical and Inorganic Chemistry and an Introduction to Organic Chemistry 

2.11 Group II elements and their compounds 

2.11.1 Explain why these are regarded as s-block elements; 

2.11.3 Investigate and describe the reactions of the elements with oxygen, water and dilute acids;

 2.11.4 Describe the basic nature of the oxides and their reactions with water and dilute acids; 

The learning outcomes are aligned to the above curriculum. 

Know the appearance of elements of Group 2 and know that the metals further down the group need to be stored in oil. 

Also know their Physical and chemical properties listed in the table below.


Physical properties Chemical properties
Know they are good conductors of electricity.

Know They have low densities.

Know that they have grey shiny surfaces when freshly cut with a knife.

Know that they are very reactive metals.

Know that they form ionic compounds with non-metals.


Group 7 (17): Halogens


Know the trends in the reactivity of the halogens can be explained by their readiness to accept electrons from other species.

This learning outcome is aligned to the CCEA GCE Chemistry curriculum: 


Unit AS 1: Basic Concepts in Physical and Inorganic Chemistry 

1.8 Halogens

1.8.5 Describe the trend in oxidising ability of the halogens down the Group applied to displacement reactions of the halogens with other halide ions in solution;


1.10 Qualitative tests

1.10.4: Adding acidified silver nitrate solution to distinguish between chloride, bromide and iodide (followed by adding dilute and concentrated ammonia solution)

Curriculum Alignment

Engage: Teacher helps students reflect on what they already know and identify any knowledge gaps. It is important to foster an interest in the upcoming concepts so students will be ready to learn. Teachers might task students with asking opening questions or writing down what they already know about the topic. This is also when the concept is introduced to students for the first time.


Students are given these video links prior to the class as per the flipped classroom strategy being employed. Students will look at the videos at home, answer the questions relating to the videos. They will also form their own questions and ideas, so they then explore the practical investigations, which they have observed and they will ask probing questions to the teacher whilst also answering the question set which was given to them previously. The idea of asking and answering questions, formulating ideas will give the student a better understanding of the practical activities they will be carrying out. Once they carry out the practicals, the students will have to make inferences based on the results to see if these inferences agree with the hypothesis, which they wrote down before the experiments. 


Materials: Video links, notes with embedded questioning


Before 1st lesson: 


Before 2nd lesson: 


Before 3rd lesson: 


Before 4th lesson: 


Preparation before each lesson: [ 20] Minutes to prepare the lab for the experiments

Facilitation of Learning Experience: [10 ] Minutes 

Transition: [ 2] Minutes

Teacher will: lead the Q&A sessions, explain concepts at the beginning of each of the 4 lessons

Students will: listen intently, take notes and ask questions

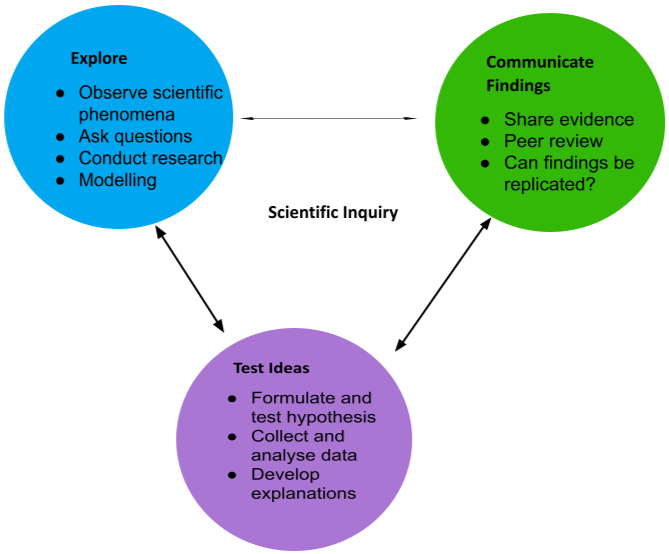
Explore: During the exploration phase, students actively explore the new concept through concrete learning experiences. They might be asked to go through the scientific method and communicate with their peers to make observations. This phase allows students to learn in a hands-on way.

Materials: Practical equipment and chemical analytes

Facilitation of Learning Experience: [30] Minutes 

Teacher will: Facilitate the practical class, give instruction to students and make them aware of health and safety with regards to their practicals

  • 1st lesson: Flame test – practical in the lab
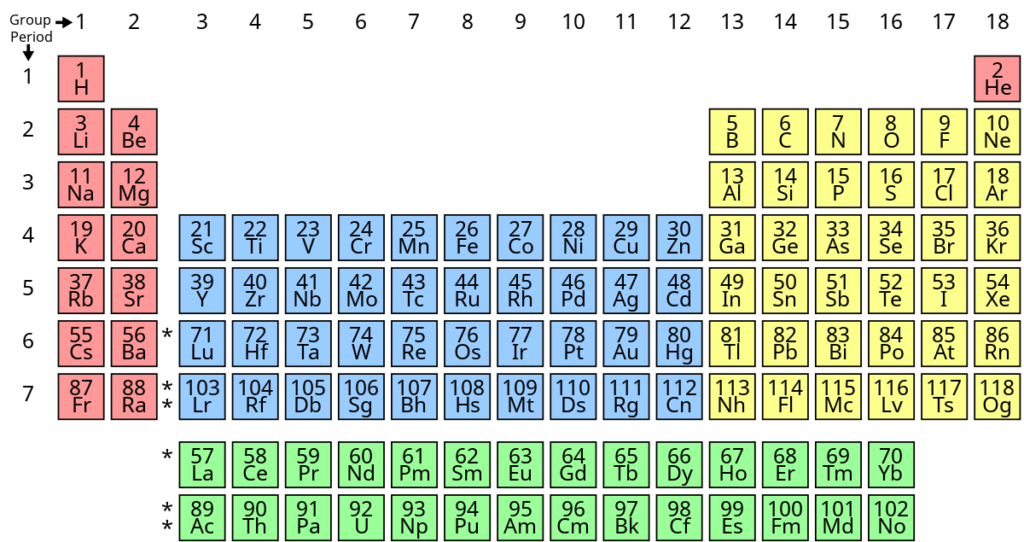
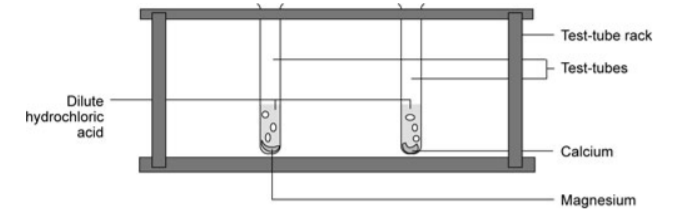
  • 2nd lesson: Look at physical characteristics of the metals in group 2 and how reactive they are – practical in the lab
  • 3rd lesson: Reactions with group 2 and group 7 elements – practicals in the lab
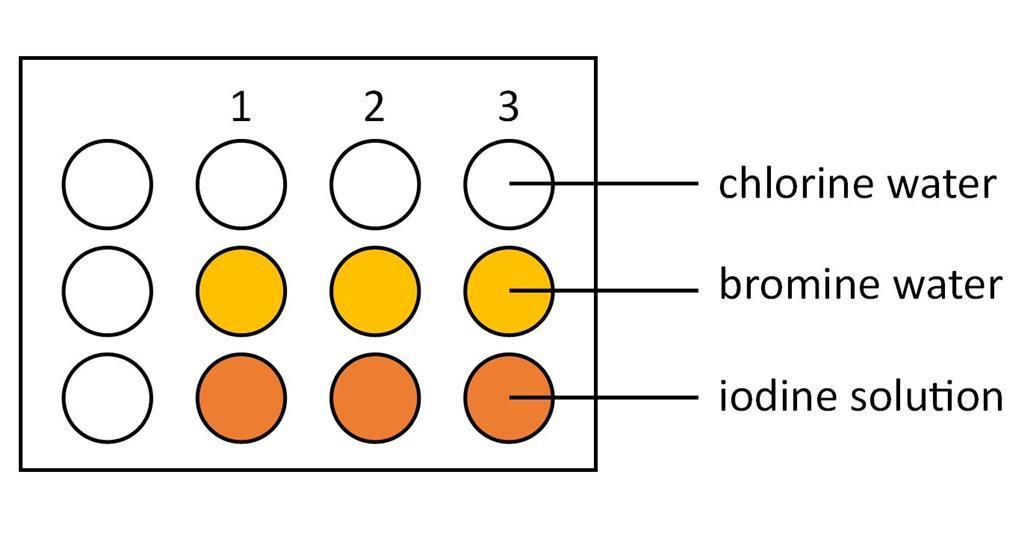
  • 4th lesson: Displacement reactions of the halogens with other halide ions in solution and adding acidified silver nitrate solution to distinguish between chloride, bromide and iodide (followed by adding dilute and concentrated ammonia solution) – practicals in the lab

Students will: Carry out their practicals safely and accurately, students will read the instructions and understand them before commencing with the practical.

Explain: This is a teacher-led phase that helps students synthesise new knowledge and ask questions if they need further clarification. For the Explain phase to be effective, teachers should ask students to share what they learned during the Explore phase before introducing technical information in a more direct manner, according to “The 5E Instructional Model: A Learning Cycle Approach for Inquiry-Based Science Teaching.” This is also when teachers utilise video, computer software, or other aides to boost understanding.

If students are finding it difficult to carry out any of the practicals, the teacher would further explain and can address the difficulty during the practical. 

Materials: lab equipment to support further explanation

Preparation: [ 0] Minutes 

Facilitation of Learning Experience: [5 – 10 ] Minutes 

Transition: [ 0] Minutes

Teacher will: further explain the concept or technique to be applied in the lab

Students will: listen intently and apply the knowledge

Elaborate: The elaboration phase of the 5E Model focuses on giving students space to apply what they’ve learned. This helps them to develop a deeper understanding. Teachers may ask students to create presentations or conduct additional investigations to reinforce new skills. This phase allows students to cement their knowledge before evaluation.

After each lesson, students are asked to work in groups and research the topic in more detail.  They will then prepare a presentation as a homework, and teach the class a different aspect of the practical. 

Materials: Power point software, student notes

Preparation: Approximately [60 ] Minutes for students to carry out research and prepare the slides

Facilitation of Learning Experience: [ 10] Minutes per group to present their lesson

Transition: [ 0] Minutes

Teacher will: Evaluate a presentation given by the students on what they found after the practical analysis.

Students will: Present to the teacher and will answer relevant questions by the teacher to assess their level of understanding.

Evaluate: The 5E Model allows for both formal and informal assessment. During this phase, teachers can observe their students and see whether they have a complete grasp of the core concepts. It is also helpful to note whether students approach problems in a different way based on what they learned. Other helpful elements of the Evaluate phase include self-assessment, peer-assessment, writing assignments, and exams.

Students are given notes with post practical questioning and web links to chemistry sites to extend students understanding of the practical topics.

The post practical questioning could be left until the next class if your time runs over during the practical session.  

Students can also be given a test OR time bound assignments. 

Materials: Tests OR Time bound Assignments

Preparation: [ 10 ] Minutes 

Facilitation of Learning Experience: [5] Minutes to provide students with notes and post practical questioning. 

[45 -60 ] Minutes for a test or Time bound Assignments OR 

Transition: [ 0 ] Minutes

Teacher will: direct students to resources to enhance their understanding OR Present the students with a time bound assessment based on their findings 

Students will: complete the embedded questions after watching the video links supplied by the teacher OR Answer the questions as fully as possible in the allocated time.

Independent learning tasks (ILT): Provide two-three challenges to students to complete before the next lesson. 

  • Students will watch the video links given to them by the teacher to enhance their knowledge.
  • Students will research real life applications of what they have learned within the classroom.
  • Students will answer post class questions 
  • Students will work in groups to prepare presentations and to present them to their class

Lesson

Students will be given feedback on a one to one basis in a timely manner. The feedback will reference the skills outcomes that the assessment was designed to test and if the student met those outcomes. It will also take into account feedback from the student on how they found the lesson.

Student feedback

The knowledge gained in this lesson can be mapped against atomic structure in the AS/A2 Physics and the roles of bioavailable metals in AS/A2 biology. Also, the bonding of halogens in biological molecules.

Curriculum mapping of outcomes attained

Practical, student presentation, time bound assessment and Q&A.

Jump to:

Materials

This lesson plan will be accompanied with a full practical instructions for the lessons, below is just a summary.

Halogen compounds fluoride, chloride, bromide and iodide 

Sodium chloride 

Sodium bromide 

Sodium iodide

Dilute and Concentrated ammonia solution

Test-tubes

Test-tube racks

Metal tweezers

Water basin

Bunsen burner

Retort Stands

Silver Nitrate

Sodium Bromide

Sodium Iodide

Dilute Nitric acid

Nichrome wire loop

Dilute Hydrochloric acid

Li+, Na+, K+, Ca2+, Ba2+ and Cu2+ (Metal Salts)

Distilled water

Chlorine water

Bromine water

Iodine water

Silver fluoride

Silver chloride

Silver bromide

Silver iodide

Ammonia

Group 2 metals

Fume cupboards

Eyeglasses

Laboratory coats

Gloves

Preparation

Students should look at the video links provided and attempt questions in their notes, Q&A should be conducted by the student to ascertain if the students understand the concepts before undertaking the practical.

Team Work

Students will work in teams to research the topics and prepare a presentation for the class regarding each of the experiments. This is an extension of the knowledge base, where students have to researchers more about the inferences made regarding the practical activities.

Rubrics

Include a scoring guide to evaluate the quality of students’ assessment responses.

Practicals

Scale of Independent Work
Zero Independence A lot of Help with Some Independence  Semi Independent Fully Independent
Teacher gives students a full method with clear instructions for how to carry out the experiments. Teacher gives students an outline for the procedure but allows options* at different steps. Teacher gives students an outline for the procedure to carry out the experiments, but with some options in technique and equipment. Teacher specifies the compound and concentration of solution. Students research the method to carry out for the preparation of the experiment. Students research methods to carry out the experiments using the equipment provided. Students choose the chemical and concentration to be made. Students research methods for carrying out the experiment and choose the method, chemicals and equipment to use.
Observation and Assessment of Competencies
Follow written and oral procedures Students follow written and oral instructions Students follow written and oral instructions, making individual choices in technique or equipment. Students follow a method they have researched Students follow a method they have researched
Safely uses a range of practical equipment and materials Students must safely use the equipment. Students must safely use the equipment. Students minimise risks with minimal prompting. Students must carry out a full risk assessment and minimise risks.
Apply investigative approaches and methods when using instruments and equipment Students must correctly use the appropriate equipment. Procedure should be followed methodically and appropriate variables measured or controlled. Students must correctly use the appropriate equipment.

Procedure should be followed methodically and suitable variables identified, measured and controlled.

Students must correctly select and use the appropriate equipment. Procedural steps should be well sequenced and adjusted where necessary. Suitable variables identified, measured and controlled. Student must choose an appropriate methodical approach, equipment and techniques. Procedural steps should be well sequenced and adjusted where necessary. Suitable variables should be identified for measurement and control. Where variables cannot be readily controlled, approaches should be planned to take account of this.
Makes and records observations Students record data in specified ways. Students record accurate data in specified ways. Students record precise and accurate data, methodically using appropriate units, in specified ways. Students must choose the most effective way of recording precise and accurate data methodically using appropriate units.
Researches, references and reports Data is reported and conclusions drawn. Students carry out presentations on the practical activities with a lot of guidance. Data is reported and conclusions drawn. Students compare results and identify reasons for differences. Students carry out presentations on the practical activities with some guidance. Students must research methods available. They compare results and report on differences. Appropriate software is used to process data and report findings. Students carry out presentations on the practical activities with minimal teacher help.  Students must research alternatives in order to plan their work. Reporting covers the planning, carrying out and an analysis of their results. Appropriate software and/or tools are used to process data and report findings. Students carry out presentations on the practical activities with no teacher help.

*Options: The more options the more student autonomy. Teachers give the students options so that the student can develop their problem solving skills. The more options the teacher gives to students, the student has greater opportunities for problem based learning and independent learning. This is measured against the practical rubrics from zero independent to full independent learning.

AISR STEM LESSON PLAN – Chemistry 15
AISR STEM LESSON PLAN – Chemistry 17

Ek

Print or Download

Annex. I.

Scientific Inquiry

Annex II. 

Test Your Idea Template

Testing Your Idea Organizer    
  • Investigative Question 

Your question should relate the manipulated variable to the responding variable. 

Investigative Question: How does the percentage flexion of your robotic articulated finger influence its ability to lift a paper cup (or other item)? 


  • Hypothesis 

Your hypothesis should be written as an “IF, THEN, BECAUSE” statement. 


  • Variables  
  • Manipulated Variable (What you will change) 
  • Responding Variable (What you will measure) 
  • Controlled Variables (What will remain constant throughout the test) 
  
  • Materials 

Create a list of all materials you need. 


  • Procedure 

Should include… 

  • Manipulated Variable 
  • Responding Variable 
  • Controlled Variables 
  • Logical, Repeatable Steps 
  • Recording of Specific Data 
  • Repeated Trials 
  
  • Data 
  • Design a table for organising data you will be collecting during your test. 
  • Use your procedure to collect and record data. 
  • Display your data using appropriate graphs and/or charts.   


  • Conclusion  
  • State your conclusion relating the manipulated variable to the responding variable.  
  • Use data to justify your conclusion. 
  • State whether your hypothesis can be accepted or rejected based on observed data. 


  • Analysis 
  • Discuss potential sources of error and the potential influence on your results. 


  • Provide ideas on how and why the experimental design might be improved. 


  • Describe surprising data. 


  • List ideas for revising your test idea or new related ideas to test. 


  • Present your findings to your class. 


Annex III. 

Flame test

Procedure:

To carry out a flame test:

  1. Dip a clean wire loop into a solid sample of the compound being tested
  2. Put the loop into the edge of the blue flame from a Bunsen burner
  3. Observe and record the flame colour produced
  4. Wash the wire loop in dilute hydrochloric acid between inoculating with metal salt.

The table shows the flame test colours for six common metal ions.

Ion present Flame test colour
Lithium, Li+ Red
Sodium, Na+ Yellow
Potassium, K+ Lilac
Calcium, Ca2+ Orange-red
Barium, Ba2+ Green
Copper, Cu2+ Blue-green


Safety 

See materials of lesson plan.


Annex IV. 

The reactivity of Group 2 metals

Procedure: 

  1. Fill two test-tubes a quarter full with dilute hydrochloric acid. 
  2. Into one test-tube drop a small piece of magnesium. 
  3. Into the other, drop a small piece of calcium.
  4. Compare the reactivity of the two metals. 
  5. Drop another bit of magnesium into the first test-tube and put your thumb over the end. 
  6. When the pressure can be felt, take your thumb off and test the gas with a lighted splint. 
  7. Record what happens. 

Safety 

See materials of lesson plan.

Annex V.

Preparing Calcium Chloride

Procedure: 

To prepare calcium chloride, we need to follow the steps listed below:

  1. Take a beaker and place the limestone in it by wearing gloves until the beaker is filled up by a quarter of its total volume. 
  2. Now, add HCl (hydrochloric acid) to 1/4th of a beaker approximately to the limestone
  3. As the hydrochloric acid dissolves limestone, it starts generating bubbles. Now gently mix the contents in the beaker and be cautions that the reaction completes. If all the limestone dissolve in it, add a little limestone. 
  4. Then, filter off the solids by pouring the solution via filter paper as soon as the solution stops bubbling.
  5. Now, heat the second beaker, which has a calcium chloride solution. The solid calcium chloride is that which is left after the water evaporates.

Safety 

See materials of lesson plan.


Annex VI. 

Procedure for the displacement of halogens

  1. Take a reaction tray and label the rows, Cl2, Br2, Iand the columns H2O, NaCl, NaBr, NaI either using a non-permanent marker pen or by placing the reaction tray on top of a piece of paper. Alternatively this experiment could be carried out on a laminated copy of the integrated instructions.
  2. Using the dropper bottle add 3–4 drops of the chlorine water to each well in the first row.
  3. Using the dropper bottle add 3–4 drops of the bromine water to each well in the second row.
  4. Using the dropper bottle add 3–4 drops of the iodine solution to each well in the third row.
  5. Note down the colours of each solution. 
  6. Add 3–4 drops of distilled water to each well in column 1.
  7. Add 3–4 drops of sodium chloride solution to each of the three wells in column 2 of the tile.
  8. Add 3–4 drops of sodium bromide solution to each of the three wells in column 3 of the tile.
  9. Add 3–4 drops of sodium iodide solution to each of the three wells in column 4 of the tile
  10. Observe and record any colour changes that take place in each row by comparing the first well with the others in the row.

Safety 

See materials of lesson plan. 


Adding acidified silver nitrate solution to distinguish between chloride, bromide and iodide (followed by adding dilute and concentrated ammonia solution)

Test for halide ions in aqueous solution. Test for chloride, bromide and iodide ions in aqueous solution 

This test has to be done in solution. If you start from a solid, it must first be dissolved in pure water.

The solution is acidified by adding dilute nitric acid. (Remember: silver nitrate + dilute nitric acid.) The nitric acid reacts with, and removes, other ions that might also give a confusing precipitate with silver nitrate.

Procedure: 

    1. To a small volume of each of the solutions of potassium chloride, potassium bromide and potassium iodide in three separate test tubes, add an equal volume of dilute nitric acid followed by approximately 2 cm3 of silver nitrate solution. 
    2. Record your observations. 
    3. Swirl the tubes to ensure that the precipitates formed in each case are evenly distributed and then divide the contents of each tube in half. 
    4. To one half of the contents, add an excess of dilute aqueous ammonia solution and observe what happens. Record your observations. 
  • To the other half, and working in a fume cupboard, add an excess of concentrated ammonia solution and observe what happens. Record your observations. 

Silver nitrate solution is then added to give:

ion present observation
F-
Cl-
Br-
I-


Safety 

See materials of lesson plan.